DESN1002 is a course about how one can go about representing their ideas, as the name suggests. The central project throughout the course centers around a cube. This page documents my journey in creating my cube, the FANBOX, from initial paper sketches, to modeling, 3D printing, and eventually bringing it to life through animation!
Handout 1
Sketching & Modeling the Object
Instructed by Haotian Zhang
The first step in the long and treacherous journey of creating my cube began with a few measly pencil sketches of a tabletop fan. Initially, these isometric sketches were done on paper in my sketchbook. Soon after, they were transformed into a 3D model of the fan on Rhino. This was the first-ever Rhino model I made! Admittedly, the model itself is far from perfect, but this exercise helped me gain confidence and a certain level of proficiency with commonly used Rhino commands.
Midterm
Modeling & Drawing the Cube
Instructed by Haotian Zhang
This was the most iterative step of the entire design process of the cube. My initial designs did not account for factors such as the tolerance of the 3D printer, the flexibility of the material it will be printed on, as well as how it will be animated. In between the midterm evaluation, 3D printing, and animation process, I went back and forth multiple times to re-design the cube to further take into consideration the aforementioned factors as more.
Below, images and descriptions are included for both the discarded iterations and the final iteration. Browse through the galleries to see my progress!
First iteration
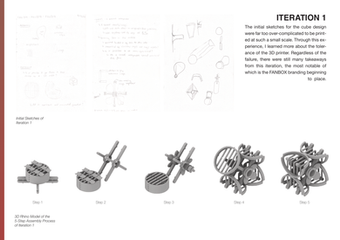
The initial sketches for the cube design were far too over-complicated to be printed at such a small scale. Through this experience, I learned more about the tolerance of the 3D printer.
Regardless of the failure, there were still many takeaways from this iteration, the most notable of which is the FANBOX branding beginning to place.
Second iteration
The second iteration took some notes from the first, although I still ran into similar issues with the tolerance of the 3D printer despite having a more simplified design.
Going forward with this, I decided to abandon the latch mechanism on the grating part of the FANBOX, as this was the part that was proving to be most problematic in the printing process.
Third iteration
This iteration took many steps to simplify the assembly process of the FANBOX. However, the mechanism used to operate it did not consistently work because of the fragility of the fan blade pieces.
After 3D printing the model, I decided that the assembly process was too simple while the operation process is too complicated.
Final iteration
The final iteration came about after encountering all the aforementioned difficulties. The biggest change is eliminating the grating part of the FANBOX entirely. The operation process is simplified, with fewer spinning parts since the rotation movement is often hindered by friction caused by the grooves on the surface of 3D printed structures. Instead, the cube revolves around a cone-shaped mechanism to support the flower's shape, avoiding issues caused by delicate supporting stems present in previous iterations.
Handouts 3-4
3D Printing the Cube & Packaging
Instructed by Haotian Zhang and 3D-Printed by Xinyao Liu
As aforementioned, there was a lot of back and forth in between this and the previous step. There were many failed prints due to tolerance issues, and many modifications had to be painfully made during late nights spent sanding and gluing the pieces back together. Some of them turned out quite atrocious, if not downright un-usable.
Final iteration
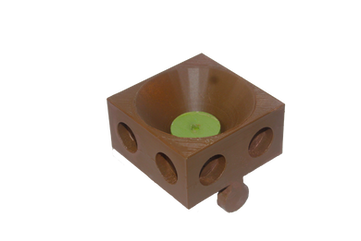
After many prints, re-designs, and copious amounts of patience, the final iteration was conceived based on the principles mentioned in the previous section. This print went much more smoothly than previous ones as there were fewer tolerance challenges for the printer to deal with, and less messy supporting structures as well. However, a significant amount of sanding still had to be done as the mechanism mainly revolved around passing an axel through a hole in the pot. The sanding ensures this movement will happen more smoothly, preventing chances of errors when operating the FANBOX.
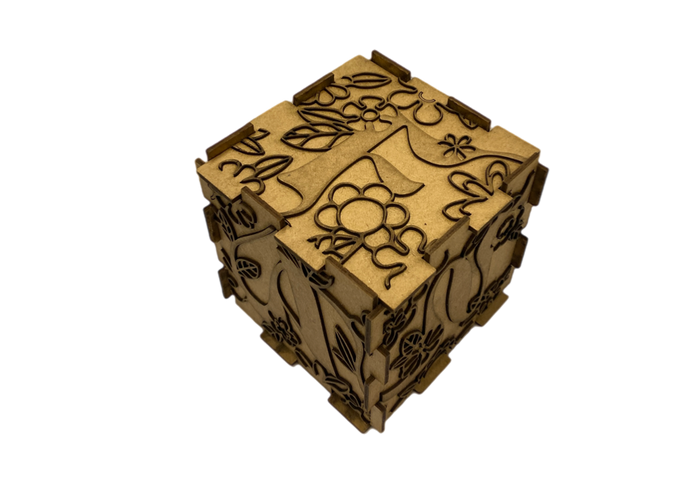
As for the packaging, it was designed to be dismantled. Each face of the box fits together like a jigsaw puzzle when assembled, then forms an instruction manual if taken apart. The patterns on the outside box continue from face to face. The cardboard was cut using a laser-cut machine. To take advantage of the precision of this tool, two layers were used to form the patterns on the box and highlight the dimensions of the cardboard sheets. As for the inside, the manual uses a print of the digital drawings of the cube on a transparent sheet of sticker paper, allowing users to see through to the cardboard texture while still being able to read the instructions.
Handouts 5-8
Building a Scene and Animating the Cube
Instructed by Haotian Zhang
For the final step of the project, we migrate from Rhino to Blender. Getting used to the Rhino commands was a challenge in and of itself, but Blender is an entirely different beast to wrestle with. It was like starting from scratch all over again. Though I felt a little disheartened at first, I've grown quite fond of Blender over the past couple of months. Before I knew it, I was spending entire afternoons to many late nights in the Knowles computer lab fidgeting with the lighting of my scene and animating various small elements to add to the ambiance of the scene.
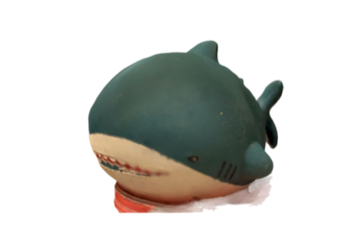
As for the elements themselves, they come from a myriad of origins. A majority of my scene was constructed with free assets I found on a SketchFab 3D model collection created by the user @lorraineopua. The whale figure and Rilke book on the worktable were scanned from real-life items in my dorm room using Polycam. Underneath the table are some text-to-3D generated pots and a watering can, subtly hiding away as they are quite a ways away from appearing perfect.
Of course, in the middle of everything is the FANBOX, now equipped with AI-generated textures from the Dream Textures add-on. This was by far the most difficult part of the entire animation process. The UV map that Blender generated for me was an absolute mess, with layers upon layers overlapping each other. This made baking the different textures together pretty much impossible, with a face or two turning black every time I try, if not the cube disappearing into the void entirely. Haotian suggested a solution to photoshop the layers together into the orientation of the original UV map. I decided to pursue this route, but with a twist; resulting in me spending many hours untangling the UV map in order to put it into a comprehensible orientation.
After many hours of modeling, texture mapping, storyboarding, animating, untangling, and (of course) rendering, comes the final animated video. All of that time spent for 20 seconds of glory.
Final Review & Portfolio
REPRESENTATION
Instructed by Haotian Zhang
The pin-up process was an entire adventure in and of itself, beginning with planning out my wall on Tuesday afternoon, laser-cutting and printing in the evening, pinning up and taking down, then pinning up again numerous times throughout the night as well as spray painting and going on a hunt throughout Knowles for a hammer, and finally wrapping up with me finishing up this website page as the sun begins to rise. Surprisingly, the long process was more energizing rather than tiring.
Below are images of my portfolio, final print-up wall, and my deliverables. With that said, I hope you enjoyed embarking on this journey with me, all the way from fan, to box, to FANBOX.


